(If you haven’t done so already, please read our earlier posts introducing this upcoming product.)
As flight testing of Chute Release has gotten underway, I wanted to begin sharing early results.
Here’s a look from a flight today in California. Other test sites include Minnesota, Colorado, and Washington.
For our setup, we used an Estes Leviathan flying on an F27R-4 motor.
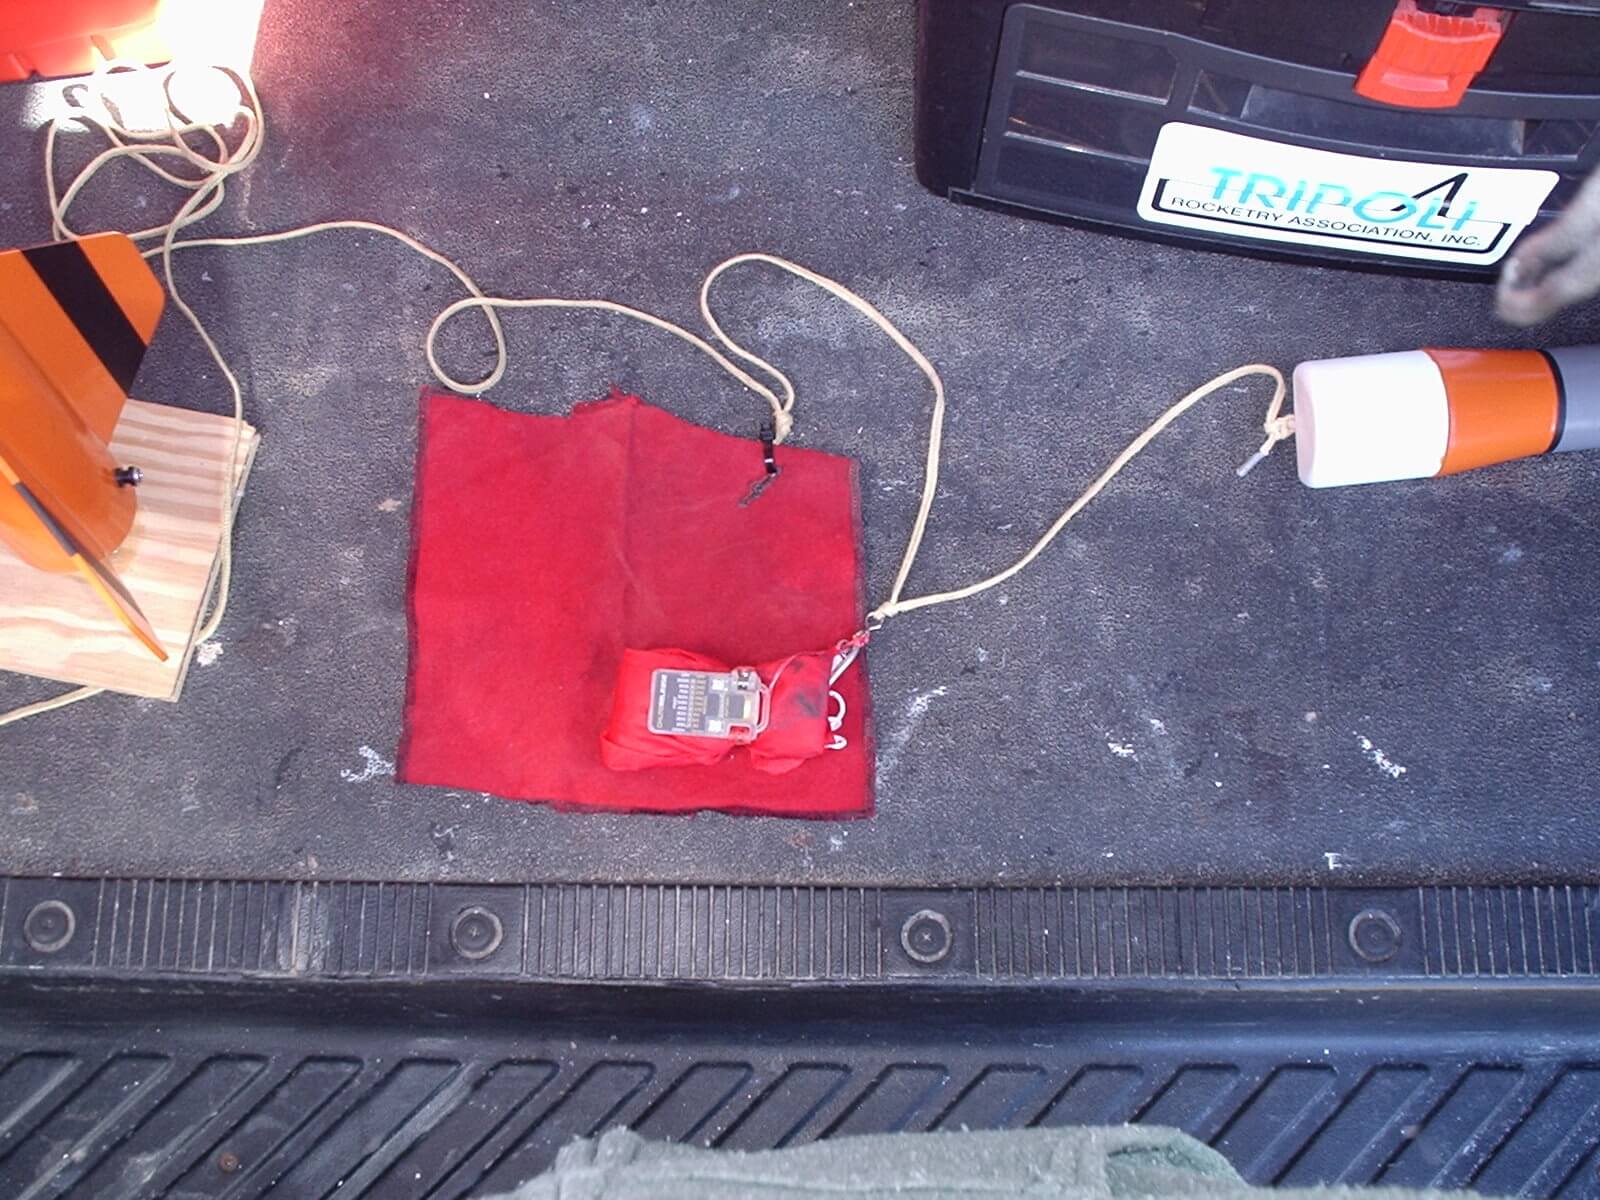
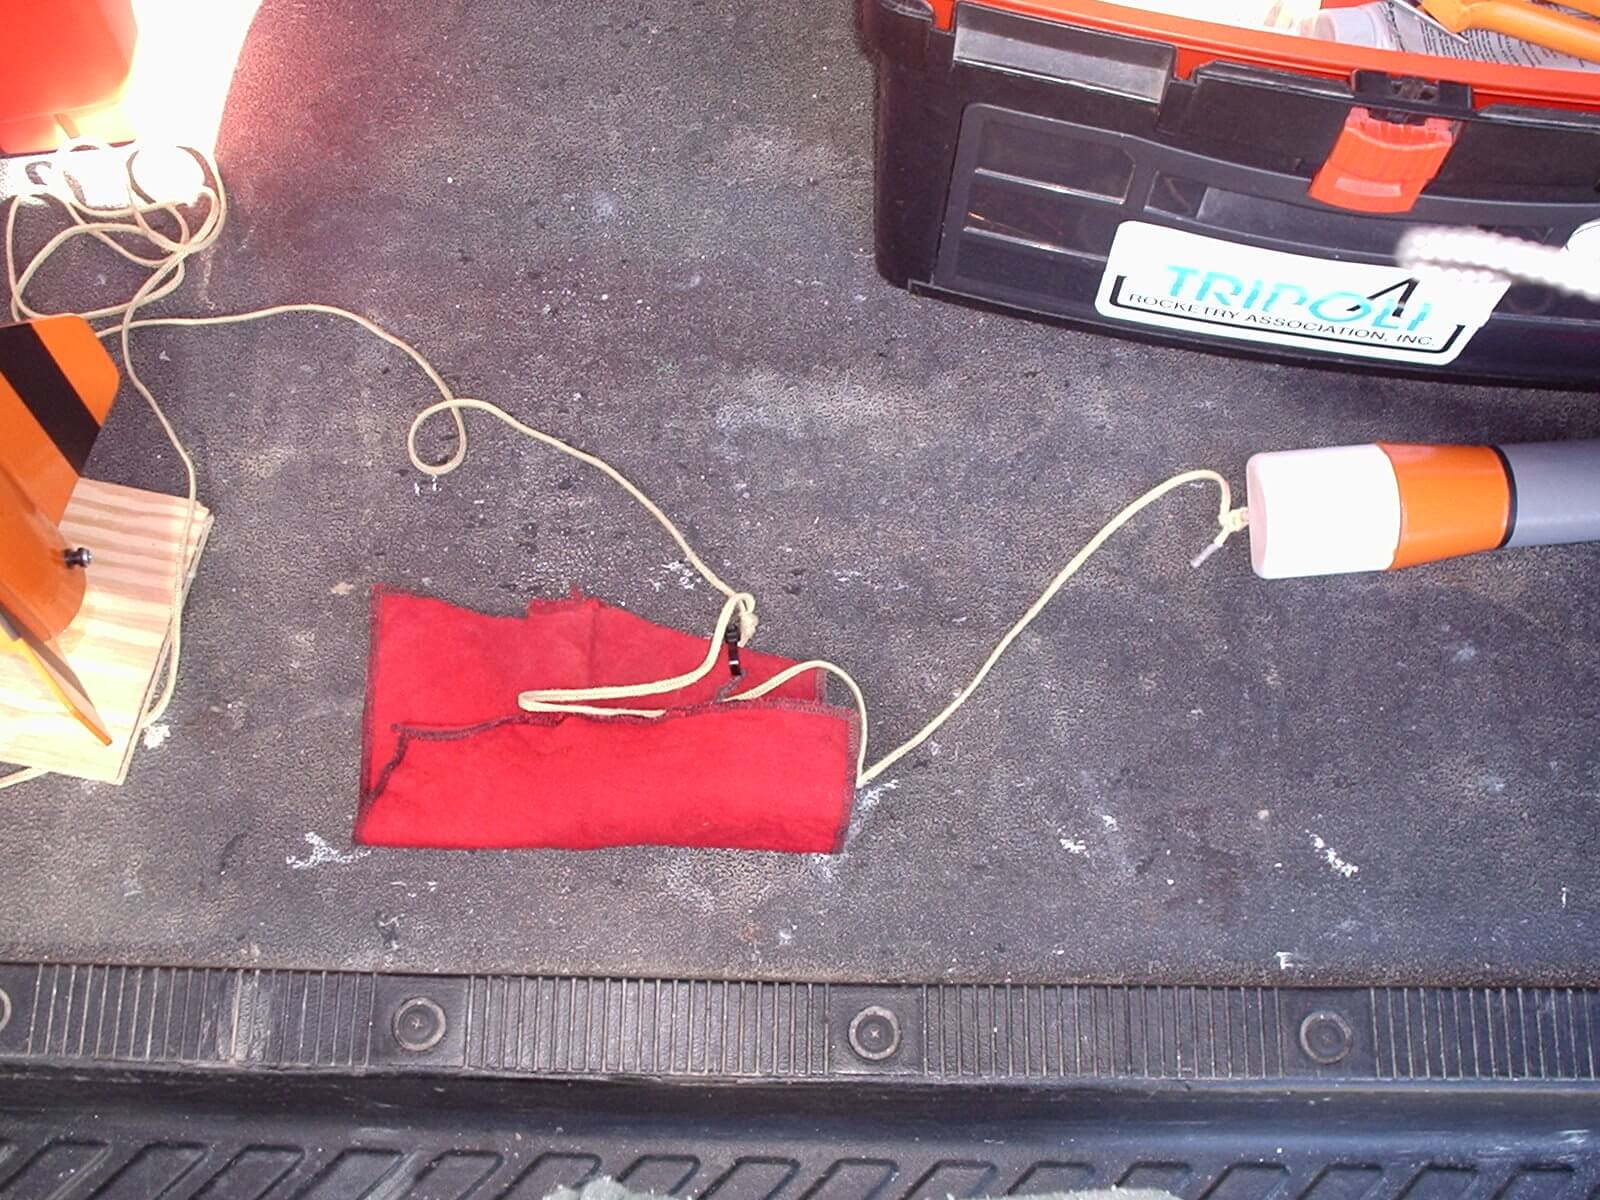
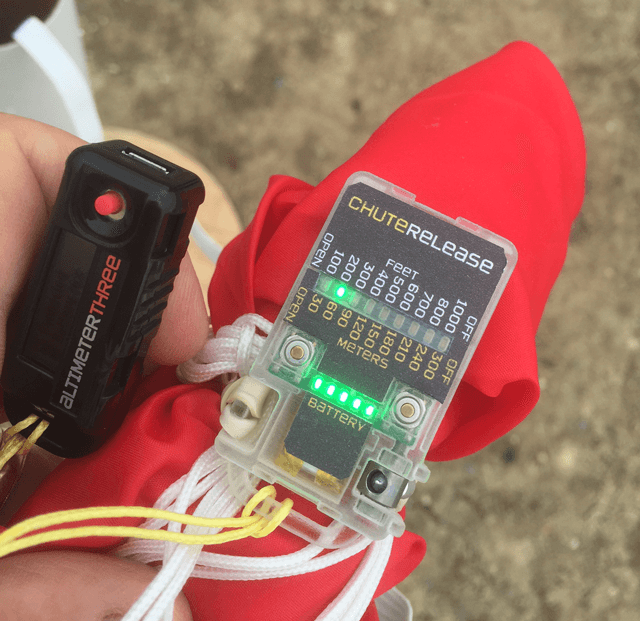
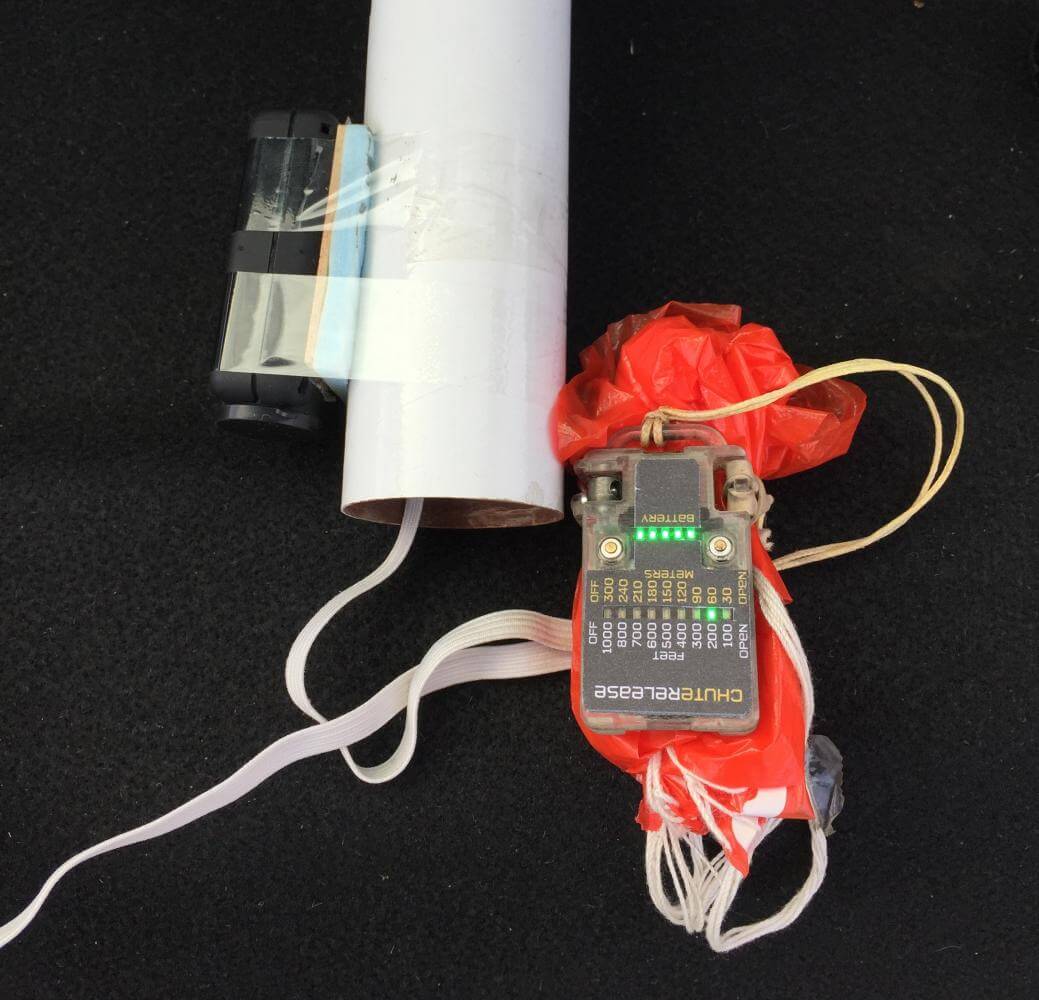
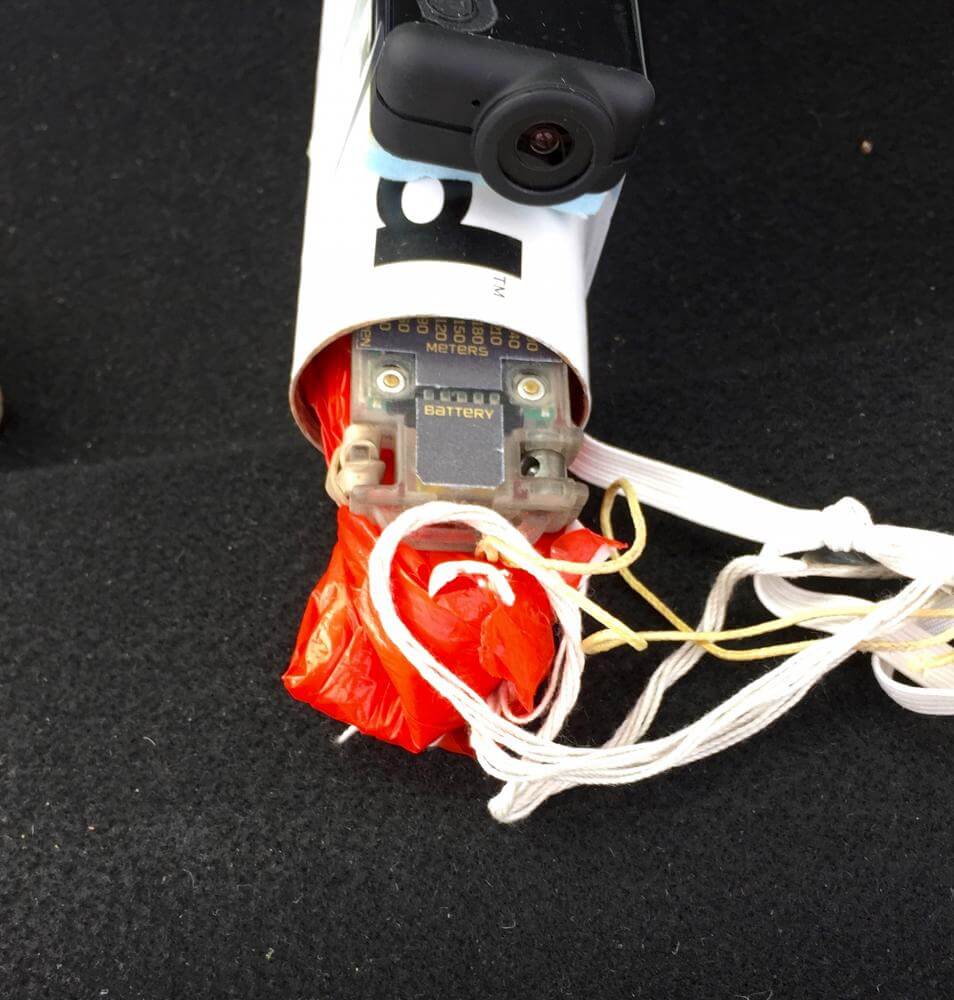
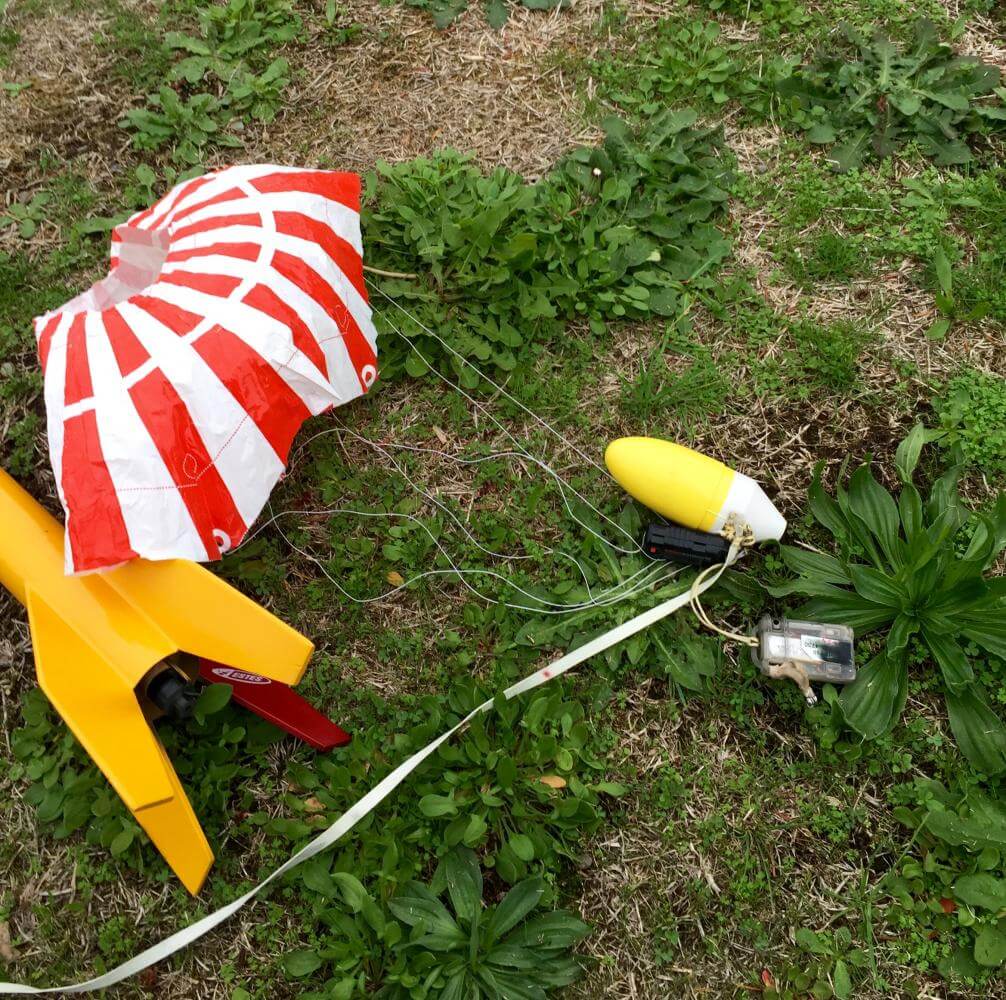
Here’s what our setup looked like:
You can see that we’ve rolled our parachute with its shroud lines so that it’s pretty closely tethered to the nosecone. In this way, once the nosecone is popped out, it will immediately drag the parachute bundle free of the fuselage. We’ve also attached AltimeterThree to record the flight.
The flight is expected to go to about 600 feet, which is nice and low for early testing. We set Chute Release to open at 200 ft for this flight. Remember that this is a prototype unit. The final ones will be more polished looking.
Here’s a video of the flight with a slo-mo around the time of release. The quality is not great (no telephoto lens this time), but we’ll get some better ones later. Go fullscreen to try and see the rocket at the time of release, which is at 24 seconds.
The flight landed about 30 feet away from the pad.
Here’s the flight data from AltimeterThree:
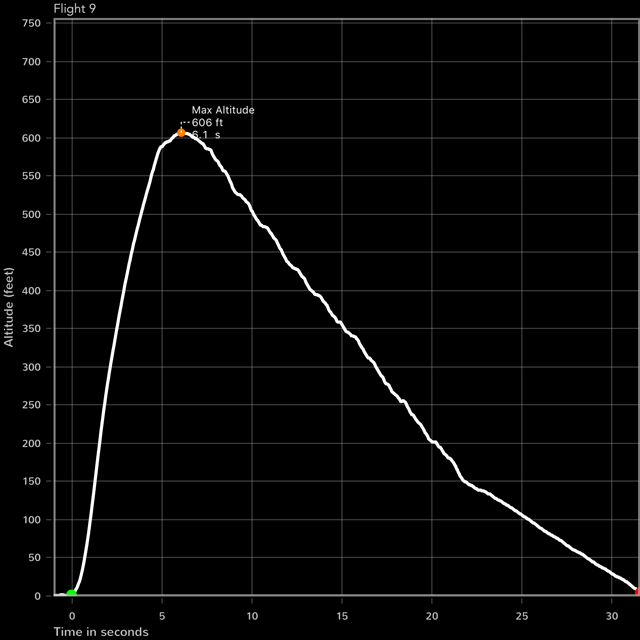
Notice that prior to the chute being released, the rocket was falling at about 30 fps. After activation, it took just over a second for the parachute to fully deploy, and below 150 feet the flight slowed to a safe 15 fps for landing.
As part of the tweaking of the firmware, we’ll probably keep track of what the “minimum deployment time” is. If we find that even the most carefully prepared setups take, for instance, 1 second to open we can adjust the firmware to open 1 second early each time. The goal would be to get the unfurled altitude as close as possible to the altitude setting, at least in the best case.
Of course, if you choose to pack your chute in a way that takes longer to open, you’ll want to add some buffer altitude.
This is a fun gadget to fly with.
More to come!
Update
The previous flights were to about 600 feet. We took Chute Release out for a little higher test yesterday, to above 1000 feet. That’s a little more realistic of a test, since flights above 1000 feet start to require a larger field, and can result in a good bit of walking and hunting on a breezy day.
We once again set Chute Release at 200 feet, but this time we loaded a G77-7R motor. We took the safety step of painting the same rocket we used before a bright Day-Glow Orange in case we needed help spotting and locating it after the flight. It turns out we needn’t have bothered.
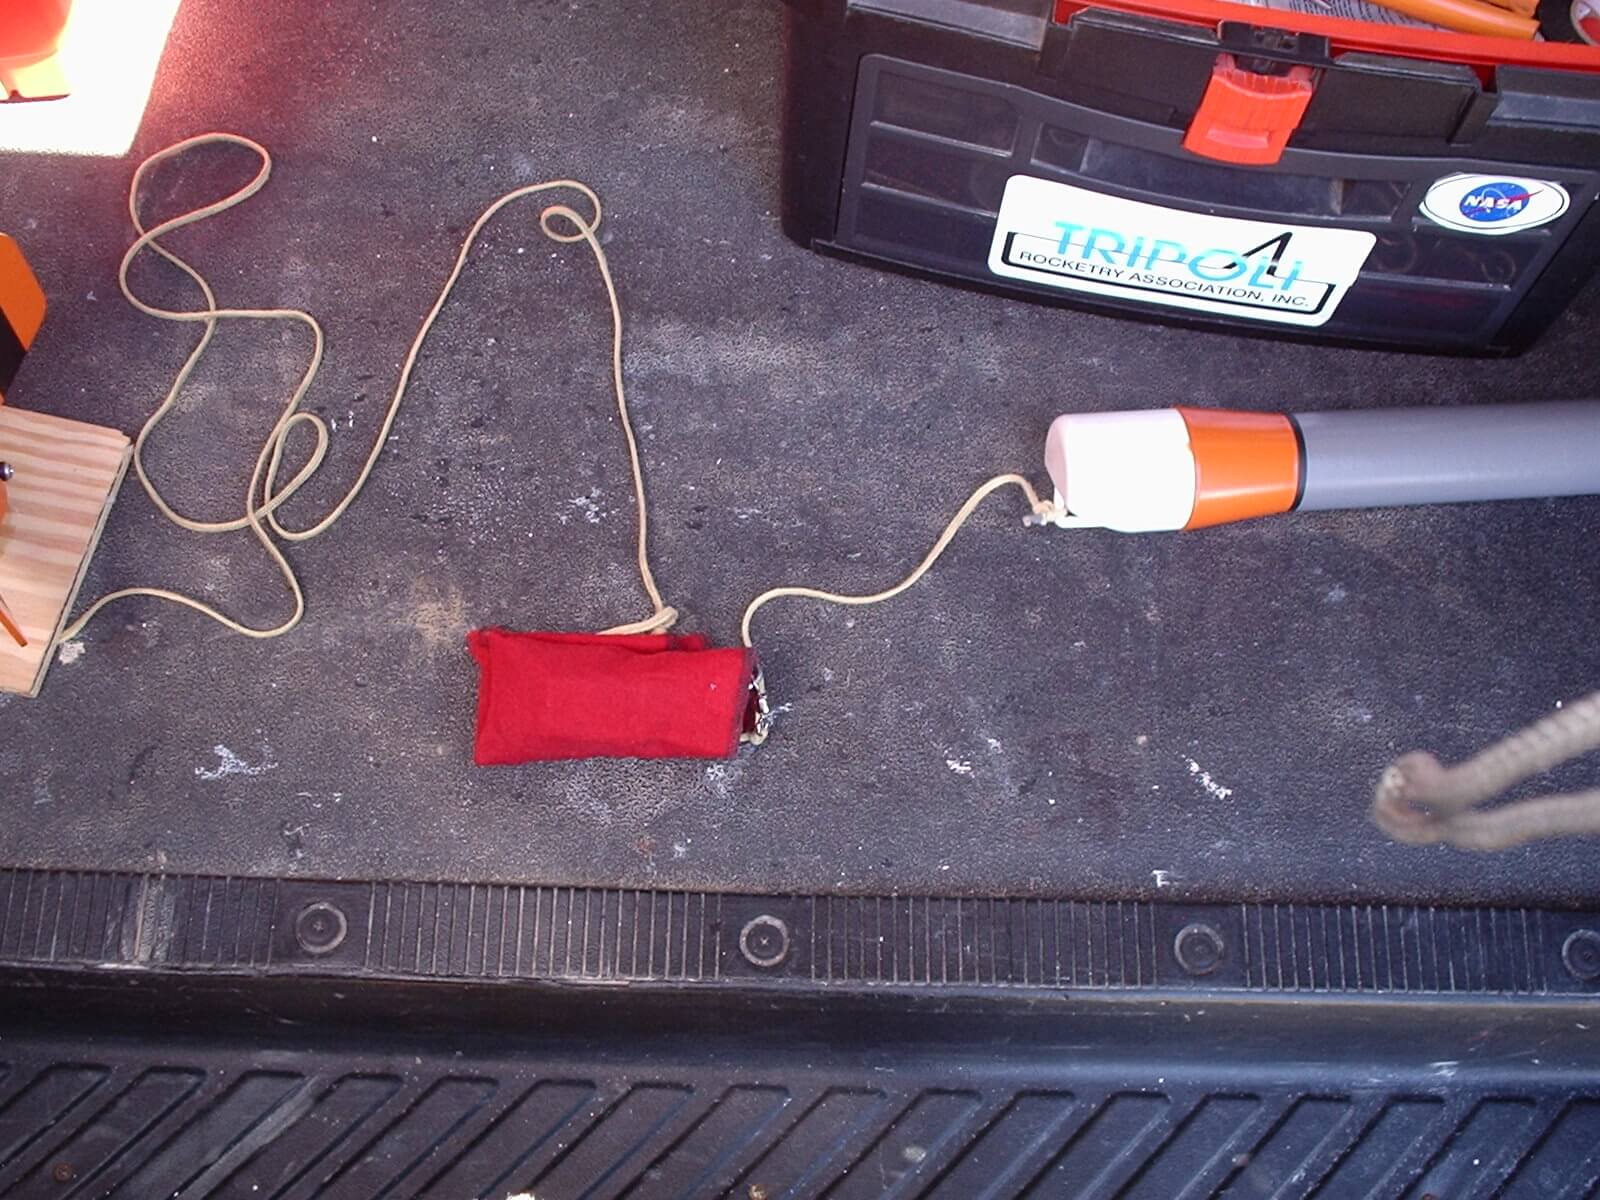
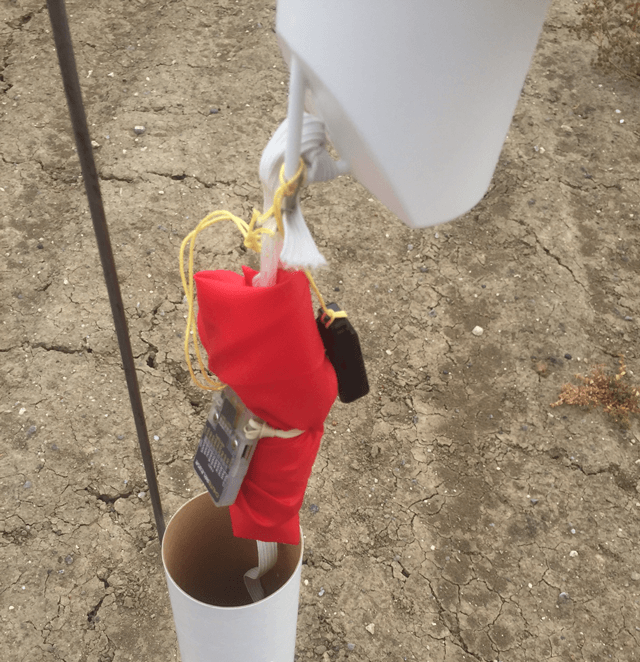
Here’s how we wrapped the chute:

The LEDs once again look crazy bright, but they need to be bright to shine through the final product case on a bright day and be visible.
The flight took off normally and punched into the local low clouds. The rocket eventually tumbled down out of them, and right on time the chute appeared to open. Although it was windier than our last flight, the rocket still landed within 100 feet of the pad.
AltimeterThree reported that our flight reached 1375 feet. Here is the data, zoomed in to the critical parachute release point:

What’s especially cool to see in this flight is that the completed release point (where the descent rate changes from about 27 fps to about 17 fps) is right after 200 feet! The way you tell that is to draw line up from the landing and see where the slope of the curve changes. Notice when the chute opens it’s bouncing around still a good bit, but that bend in the curve is right around 200 feet, which is awesome.
Of course, the final performance will always vary a bit depending on how you wrap and hold your parachute with Chute Release. I suspect a tighter wrap with more folds and even a protective blanket or bag might take a good long time to open, so in those cases I would suggest adding 100-400 feet of release altitude to give them time to open. You’ll have fun experimenting with your wrap and your release, I’m sure, and folks can share their tips online.
I’ve learned that the most important things to remember are (and these are pretty basic, I know, but I didn’t always follow them, to my sadness in flights a week ago):
- Always tether Chute Release so that you don’t lose it when it releases
- Most important: chute must come out of fuselage, or nothing after that matters
- A rolled chute can still open pretty quickly
These flights were with a pretty light rocket that tumbled pretty slowly (27-30 fps with the parachute wrapped up). In heavier rockets, it will probably be important to slow the rocket a little during its descent, so we need to experiment with either letting the parachute flap more, or with having a very tiny drogue chute that is never held by the release. The little drogue chute might also serve to pull the chute from the rocket and keep the line from flapping and tangling a bit, too.
Update
Submitted by Bernard Cawley (Washington, October 13, 2015)
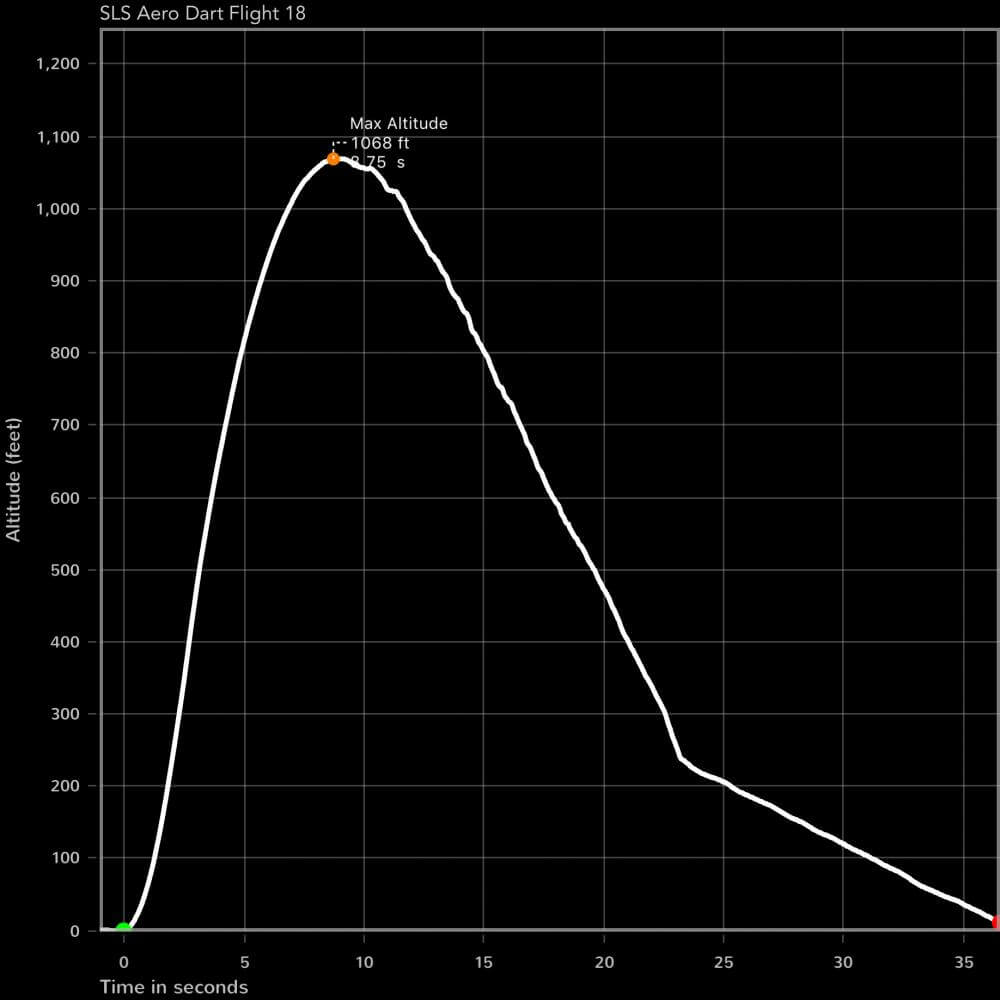
I had the chance to do some flying with a prototype Chute Release this past weekend, and put it into the air 10 times in three different models. Two of them were BT-60 (1.60 inch/40.6mm ID) based models (Estes Vagabond and Big Bertha – both with plastic ‘chutes) and one has a 1.75 inch/44.5mm inside diameter body (Semroc SLS Aero Dart – nylon ‘chute).
The user interface for the Chute Release is super simple, just as described on the Jolly Logic site here. To actually pack the parachutes with the release I basically just folded it as I would have normally, then laid the device on the middle of it, and pulled the rubber band around the other side, plugging the release fitting into its receiving socket on the left side of the CR. I did need to fold the ‘chute a bit more tightly so that the package could slide into (and later out of) the model easily enough. The last step is to turn the device on before putting the package into the rocket. Don’t forget this step!
Each of the ten flights also carried an AltimeterThree so I would have altitude vs. time data from each flight to go along with what I could see from the ground. Between the three models I flew the CR to between about 300 feet (Big Bertha on a C6-5 carrying both devices) and 1100 feet (SLS Aero Dart on Estes F15-6s). On all but one flight I had the release set at 200 feet. One of the four Aero Dart flights was set to release at 300 feet. The AltimeterThree graph from that Aero Dart flight, on an Estes F15-6, is attached as well. The knee in the time/altitude curve is very evident.
On every flight, the chute/CR package was ejected as it should be. On eight of them, the ‘chute was released as programmed, with the AltimeterThree data showing the ‘chute as opening fully around 50 feet below the set altitude. Beautiful (and fun to watch). This was clearly shown in the data from the AltimeterThree aboard. I had one non-release – on my second attempt to use the CR – which is why I emphasized TURN IT ON above.
The other flight in which the CR didn’t do its thing was a spectacular Estes E9-6 CATO in which the propellant/delay grain blew out the front of the rocket (and what was left of the motor blew out the back) shortly after liftoff. The A3 on that flight (safely in the payload section) showed an apogee of 48 feet. The ‘chute was melted and separated from the CR and the CR itself was blackened a bit, but that’s all from the CATO. That was the fourth flight of the 10, so you can see that the CR was unfazed by being briefly flame broiled, though it’s not as pretty as it was.
I did get it to false trigger on the ground once. After the I-forgot-to-turn-it-on flight I did a little field repair to the top of the Vagabond’s body tube with some thin CA, and the payload section fit got kind of snug as a result. I put it on and pulled it off a couple of times trying to get the fit to loosen a bit. In the process of doing that I heard the CR release inside the model, so clearly I managed to fake it out this way. At that point I added a small vent hole to the body of the model to avoid that in the future. I put one in the Aero Dart as well – the Big Bertha already had static ports for use with altimeters tied to the nose cone.
By the way, after the 10 flights the battery in the Chute release was still indicating fully charged. The time stamps on the AltimeterThree files show that I did those flights over the course of a little over two and a half hours.
The possibilities that this gadget opens up for models from about 1.6 inches in diameter on up are really intriguing. One that I’m personally excited about is fulfilling my goal to fly a mile high on a fairly small model (no level 2 cert needed). I am not too eager to get into all that one has to in order to do dual deployment (getting black powder, LEUP, etc., etc.) and I was wondering about how I was going to have a reasonable chance of getting the model back (even if I get my EggFinder built and installed). Now I have the answer. For another half-ounce I have a simple, reliable way to deploy the main at 500 feet or 300 feet. I might have to take the drag hit for a larger diameter (rather than being able to go minimum diameter on 29mm motors) but that will be a worthwhile trade I think.
Another is being able to fly higher on our regular club field and still stay reliably ON the field. Based on these first 10 flights, I think we could comfortably fly to 1.5 to two times as high as we normally would allow, depending on winds of the day. Plus the whole cool factor of having the effect of dual deployment that’s this simple to do and fun to watch in action is pretty exciting.
Update
If you’re interested in better video quality, Tim Van Milligan of Apogee Components does a great job of that during his test flights.
Here’s a video of his egglofter rocket with canted fins (to lend his flights spin stabilization). This flight was on an F15 motor. I like how he fastened his parachute closely to his nosecone, so that at ejection the momentum of the nosecone flying off made sure the parachute was pulled from the fuselage. Good technique to try.
Tim set Chute Release for 200 feet in this video, and it’s interesting to note that he did NOT have vents in his rocket. As long as you know that your rocket will eject Chute Release well above 100 feet (so that Chute Release has a few seconds to get acclimated in the air), it should function the same with or without vents.
If you watch the video a few times you can see the moment that Chute Release triggers, as the parachute begins pulling away from the nosecone and the parachute begins to inflate. There was no AltimeterThree onboard to record the flight, but based on timing it probably took about 50-75 feet for the parachute to fully slow the rocket.
Update
By Andrew Kleinhenz, Ohio
I had a chance to attend the Tripoli Mid Ohio launch and was able to do a number of flights using the chute release. Since I had limited time, I decided to test one thing, namely using Chute Release with a fire blanket. I figure many do not use or install baffles in their rockets. Many will purchase this item and want to protect it, but may not have a baffle. I concede that this method will create limitations on tube diameters etc. but it is what it is.
For this test I used a 2.5” Estes Sahara kit. So off we go.
The flights were on F40-W then a G40-W then a G80-T. On ALL flights Chute Release performed perfectly. The unit did not get any burn marks on it except the last flight but it was very very minor. As the photos show, I wrapped the whole lot in a fire blanket. The force of the nose cone removed the bundle from the blanket and it all seemed to work perfectly. The only thing I would change is I would increase the distance between the blanket and the bundle. I also think when using this method that one should be really sure things are not packed to tight in the tube. Either way I will do more flights and see what happens.
When I got to the launch, I was surprised after all the interest on this product from the forums, that NOBODY heard of it. So, I did a lot of demos and at times I felt like a marketing rep! At one point I did a demonstration at a table with about six guys watching. They were all extremely impressed. One guy said this is going to change things in a big way. I did have a guy ask if he could try it on a high power rocket with single deploy. I set it up for him and he launched a PML kit on an H motor with a 45″ chute. Again the flight went off without a hitch to over 2000 feet. He had a piston in his rocket so we did not use a baffle.
All release recoveries were set at 400 feet.